ZTE F6005v3
Hardware Specifications
| Vendor/Brand | ZTE |
| Model | F6005v3 |
| ODM | ✅ |
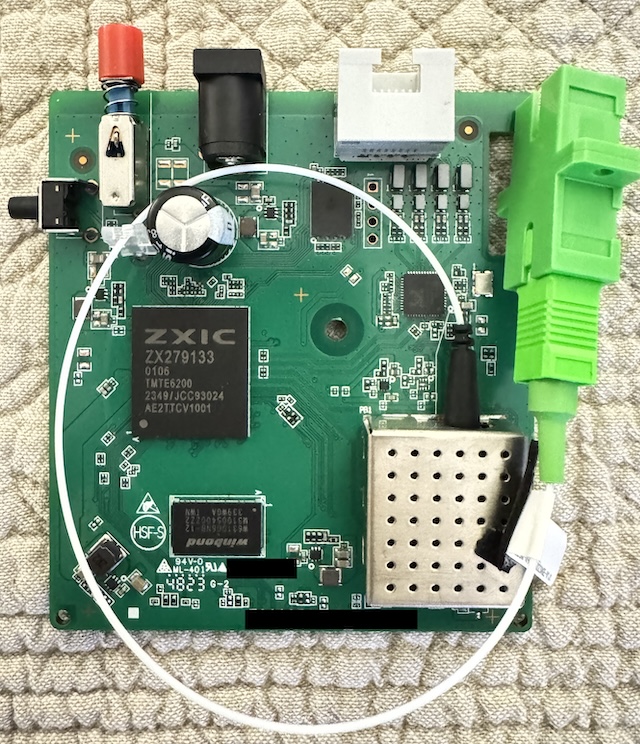
| CPU | ZTE ZX279133@A53 |
| CPU Clock | 2x1200MHz |
| Chipset | ZTE ZX279133 |
| Flash | 128 MB (SPI NAND FM25S01A) |
| RAM | 128 MB |
| System | Customized Linux by ZTE |
| 2.5GBaseT | No |
| Optics | SC/APC |
| IP address | 192.168.1.1 |
| Web Gui | ✅ user admin, password admin or defined by ISP |
| SSH | |
| Telnet | ✅ 1 |
| Serial | ✅ 2 |
| Form Factor | ONT |
List of software versions
HW V3.0
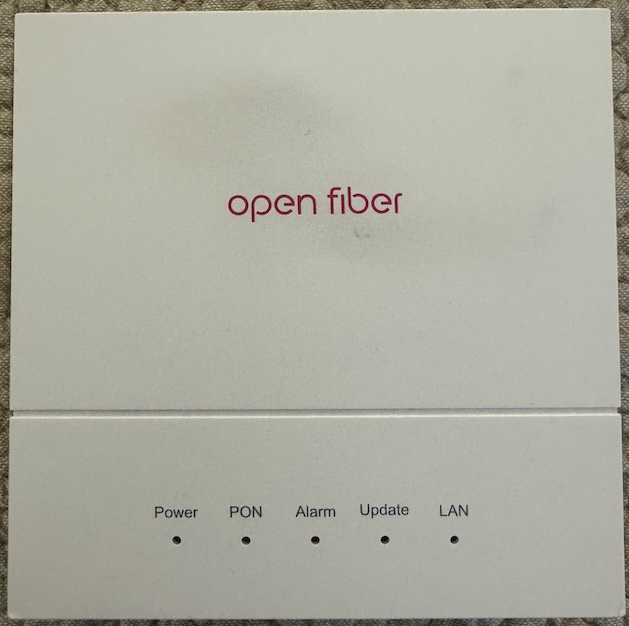
- V3.0.10P3N2 (OpenFiber)
- V3.0.10N06, internal version is V3.0.10P2N6 (TIM Italy)
List of partitions
HW V3.0
| dev | size | erasesize | name |
|---|---|---|---|
| mtd0 | 08000000 | 00020000 | “whole flash” |
| mtd1 | 00300000 | 00020000 | “uboot” |
| mtd2 | 00400000 | 00020000 | “others” |
| mtd3 | 00400000 | 00020000 | “parameter tags” |
| mtd4 | 00400000 | 00020000 | “wlan” |
| mtd5 | 00800000 | 00020000 | “usercfg” |
| mtd6 | 00400000 | 00020000 | “middle” |
| mtd7 | 02a00000 | 00020000 | “kernel1” |
| mtd8 | 02a00000 | 00020000 | “kernel2” |
| mtd9 | 02500000 | 00020000 | “rootfs1” |
| mtd10 | 029e0000 | 00020000 | “rootfs2” |
This ONT supports dual boot, as visible from the presence of kernel0 and kernel1, which contain the rootfs. The boot images can be swapped with the following command but currently not works because if U-Boot is updated, a revert will brick ONT:
upgradetest switchver X
Where X can be 0/1, based on the image you want to boot from.
You can also clone the currently running image into the other slot using this command:
syn_version
Use
Enable Telnet
python3 zte_factroymode.py --user CUSTOM_USER --pass CUSTOM_PASS --ip 192.168.1.1 --port 80 telnet open
You should get this output and credentials to login over telnet:
trying  user:"CUSTOM_USER" pass:"CUSTOM_PASS"
reset facTelnetSteps:
reset OK!

facStep 1:
OK!

facStep 2:
OK!

facStep 3:
OK!

facStep 4:
OK!

facStep 5:
OK!

done
Username: 2W3iqFVt
Password: Eqb8X8Qt
Enable console redirection
To see omcidebug messages on telnet, execute this command (just the first time of each connection):
redir printf
GPON ONU status
Getting the operational status of the ONU
To check the connection status, use the following command:
gpontest -gstate
[gpontest] gpon state is [O5] for O5 state
Getting OLT vendor information
sendcmd 132 omcidebug showmedata 131
This command will print the following output:
##################################
MIB INFO:
         ME CLASS: 131
         DB NAME: olt_g, DBHandle: 32
##################################

<-----MeID[ 0x0000,0 ], Addr[ 0x19a2b1]----->
         Vendorid:48 57 54 43
      EquipmentID:00 00 00 00 00 00 00 00 00 00
                    00 00 00 00 00 00 00 00 00 00
          Version:31 30 00 00 00 00 00 00 00 00
                    00 00 00 00
        TimeofDay:00 00 00 00 00 00 00 00 00 00
                    00 00 00 00
---------------------------------------------------------------------
Querying a particular OMCI ME
sendcmd 132 omcidebug showmedata ID_MIB (eg. 7 for Firmware version)
This command will print the following output:
##################################
MIB INFO:
         ME CLASS: 7
         DB NAME: soft_image, DBHandle: 14
##################################

<-----MeID[ 0x0000,0 ], Addr[ 0x19a011]----->
          Version:V3.0.10P3N2
     Is committed:01
        Is active:01
         Is valid:01

<-----MeID[ 0x0001,1 ], Addr[ 0x19a031]----->
          Version:V3.0.10P3N2
     Is committed:00
        Is active:00
         Is valid:01
---------------------------------------------------------------------
GPON/OMCI settings
Setting ONU GPON Serial Number
setmac 1 2176 ZTEG
setmac 1 2177 AABBCCDD
Setting ONU GPON PLOAM password
This can be done easily via the web UI. To do it via the shell use:
setmac 1 2181 1234567890
setmac 1 2178 1234567890
Setting ONU GPON Equipment ID
setmac 1 32770 "5::F6005V3.0:"
Check Images CRC
upgradetest bakver

backup version crc is ok
success!
Persistent telnet access
Needed tools:
- Linux VM or WSL with Python >3.3
- ZTE Telnet enabler
After the ONT has rebooted and you can access again, telnet can be enabled on each reboot. To do this, run again zte_factroymode.py to open new session to it. When you are in, execute these commands:
sendcmd 1 DB set TelnetCfg 0 TS_Enable 1
sendcmd 1 DB set TelnetCfg 0 Lan_Enable 1
sendcmd 1 DB set TelnetCfg 0 TS_UName root
sendcmd 1 DB set TelnetCfg 0 TS_UPwd root
sendcmd 1 DB set TelnetCfg 0 TSLan_UName root
sendcmd 1 DB set TelnetCfg 0 TSLan_UPwd root
sendcmd 1 DB set TelnetCfg 0 InitSecLvl 2
sendcmd 1 DB saveasy
sendcmd 1 DB addr FWSC 0
sendcmd 1 DB set FWSC 0 ViewName IGD.FWSc.FWSC1
sendcmd 1 DB set FWSC 0 Enable 1
sendcmd 1 DB set FWSC 0 INCName LAN
sendcmd 1 DB set FWSC 0 INCViewName IGD.LD1
sendcmd 1 DB set FWSC 0 Servise 8
sendcmd 1 DB set FWSC 0 FilterTarget 1
sendcmd 1 DB saveasy
Reboot the ONT and a telnet interface will be available. You can login using root\root as credentials.
Just for OpenFiber firmware
In case you want add new a admin user instead of using the embedded credentials, run these commands before rebooting the ONT:
sendcmd 1 DB set DevAuthInfo 5 Enable 1
sendcmd 1 DB set DevAuthInfo 5 User superadmin
sendcmd 1 DB set DevAuthInfo 5 Pass superadmin
sendcmd 1 DB set DevAuthInfo 5 Level 0
sendcmd 1 DB set DevAuthInfo 5 AppID 1
sendcmd 1 DB saveasy
Reboot the ONT and you can login to the WebUI using superadmin\superadmin as credentials with full unlocked menus.
Advanced settings
Backing up ONT partitions using hardware flasher
As we currently known, only firmware V3.0.10P3N2 from OpenFiber are able to open telnet (and make it persistent). It’s possible to swap RAW dump between ONTs and enable access over telnet to modify some ONT parameters.
Needed tools:
- Windows, Linux or macOS with SNANDer
- CH341a programmer with 3.3V voltage
- Pogo-Pin Probe for WSON8 8x6mm chip
Connect all needed cable from the probe to the programmer, then attach the probe to the chip (use some rubbers to make it stable) and run this command to dump the NAND:
/SNANDer -r f6005v3_dump_X.bin
Do at least 3 dumps and compare their md5 to be sure that are good.
If you want to flash this dump to another ONT, just run these commands:
/SNANDer -e
/SNANDer -w f6005v3_dump_X.bin -v
## Changing region code

<div markdown="span" class="alert alert-blue" role="alert">
  <svg viewBox="0 0 24 24" class="svg-info-icon"><use xlink:href="#svg-info"></use></svg>
  <span> <b>Note</b> Be aware that changing the region code may break features such as PPPoE depending on your ISP, and remove telnet access!</span>
</div>


ZTE has created various region codes that load default values based on the local ISP. This configuration can be changed using this command:

```sh
upgradetest sfactoryconf X
Where X is the number of supported regioncode into file /etc/init.d/regioncode, here is an example from TIM V3.0.10N06 firmware:
# cat /etc/init.d/regioncode
14:Thailand
97:ItalyTi
116:Tescali
154:Izzi
163:BrazilClaroHome
188:HollandKpnSfu
198:Manufacture
2074:ItalyFastwebSFU
Random notes
- F6005v3 read the software version exposed through the gpon_omci deamon from each kernel partition header, so the only way to spoof this parameter is to change the version in the header and recalculate CRC, otherwise the bootloader will refuse to load the image.
Miscellaneous Links
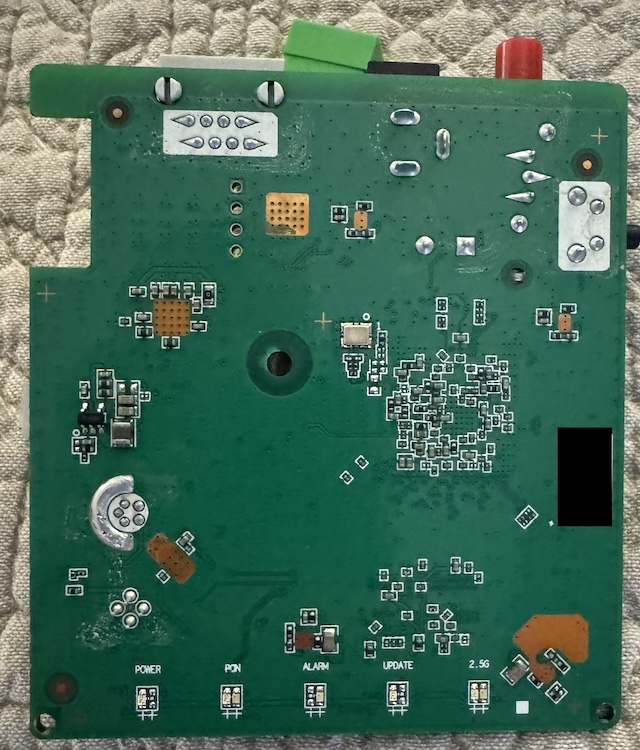
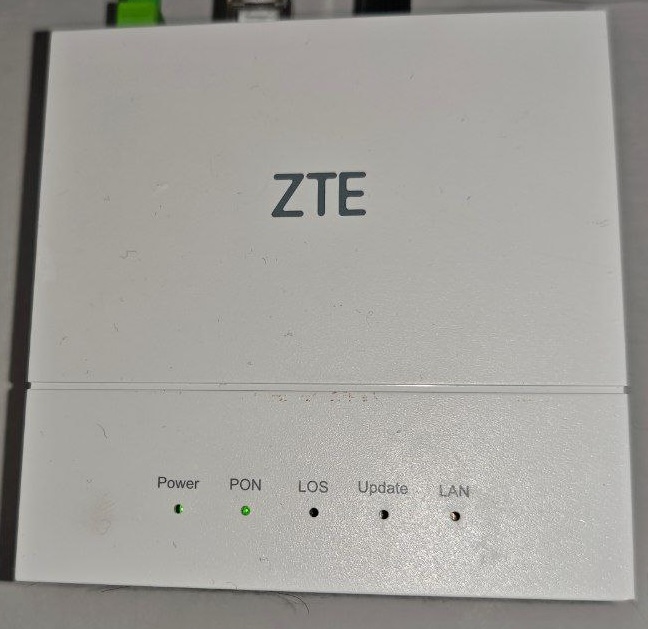
Teardown and other photos
HW V3.0